Sunday, August 28, 2016

How to Set-Up a Classroom Economy

Hey Friends!

It's Theresa, from True Life I'm a Teacher!

I wanted to share how I use (and have used for several years) a token economy in my classroom. I've taught at PBIS/PBS schools for 7 years, and a token economy is the perfect addition to what your school is already doing!

I've used this system in 1st, 2nd, and 4th grades, and absolutely LOVE it! Even better? My students love it, and that's really what matters.

While I don't use a clip chart, I have in the past, and a classroom economy can be used in conjunction with a clip chart.
Explains how to set up a token economy in an elementary classroom, while spending virtually no money!
Why Use a Token Economy?

  • Reinforces positive behavior
  • Targets specific behavior
  • Targets behavior change
  • Students work for delayed reinforcement
  • Students receive immediate and delayed reinforcement
  • Promotes fair exchanges, addition, subtraction, counting money, and economics

There are LOTS of different ways a token or classroom economy can work in your classroom. The best part is that it doesn't have to cost ANY money! I choose to spend a small amount of money on candy and gum, but not much.

Assign Values to Tasks

  • Pay Day Monday - I pay my students on Mondays just for showing up. We talk a lot about how coming to school and learning the job of my students. So I pay them!
  • Homework - I am NOT assigning homework this year, however, in the past I've paid my students for turning in their homework.
  • Reading Log - I am also NOT assigning a reading log this year, but I also paid my students for completing their reading log each night.
  • Take Home Folder - I pay my students daily for remembering to turn in their Take Home Folder each day.
Pay as You Go
  • Hand out your classroom money as you catch students doing things they should. This is especially beneficial at the beginning of the year when you're trying to reinforce procedures, routines, and expectations.
  • This can be continued throughout the year, or you can switch to the assigned values method once students know and regularly demonstrate classroom and school expectations.
Combination
  • You can also use a combination of both methods. It really comes down to your students, their needs, and your preference.
How Much Do I Pay?
  • Pay Day - $10 every Monday
  • Homework - $5 every Friday
  • Reading Log - $1/daily
  • Take Home Folder - $1/daily
  • Positive Behavior - $1 as neededExplains how to set up a token economy in an elementary classroom, while spending virtually no money!
Deductions / "Fines"
  • Depending on the age of your students, and your preferences, you may want to consider "fining" your students. However, in my experience, a classroom/token economy works much more effectively, if students are not penalized for misbehavior, BUT it also depends on each individual student.
  • Some students respond well to understanding that there are penalties associated with certain behaviors. For example, students who are "blurters" may respond well to being fined $1 for each time they blurt. This is an intervention you can set up with individual students, or the whole class, if needed.
  • Penalties aren't typically necessary because regardless of the method you choose, if a student isn't doing what they need to be doing (homework, expectations, etc...) they just wouldn't get the token for that task.
  • For example, if a student doesn't turn in homework, they simply don't get paid for their homework...I do not also require them to "pay" me and amount.
So what do students DO with their money?
Explains how to set up a token economy in an elementary classroom, while spending virtually no money!
Fun Friday
  • Every Friday is Fun Friday! It's the last 10-20 minutes of the day, and it's free time. Blocks, Legos, coloring, computers, board games, puzzles, pretty much whatever. That's the beauty of it. 
  • Before students can purchase ANYTHING from the class store, they must pay for Fun Friday. It's not optional. I charge $5 for Fun Friday. Although, you could make it whatever you want depending on your class.
  • You should charge a fair amount though. You WANT most or ALL of your students to be able to participate.
  • Students who cannot afford Fun Friday, complete a reflection sheet, and have one-on-one conferences with me to talk about why they were unable to participate, and to set a goal for the following week!
Class Store:
Explains how to set up a token economy in an elementary classroom, while spending virtually no money!
  • I open the class store every Friday during morning work. I call students back to my table a few a time. Students must purchase Fun Friday first, and may then purchase anything they'd like in the class store, that they have the money for. Does it take time? YES! However, the payoff is HUGE! The real life skills my students learn far outweigh the amount of time this takes each week.
  • Students may also choose to save their money, to purchase a more expensive option from the class store. Some students spend every penny they have, others spend a little and save a little, others purchase only Fun Friday and save the remainder.
  • These are the items I have available for "purchase" in my classroom. But the list is pretty endless. It just depends on what is allowed at your school, and what you want in your classroom. You can grab these "coupons" HERE.
    • Shoes off in the classroom
    • Computer time
    • Choose the brain break
    • Sit by a friend
    • Fun Friday
    • Choose a stuffed animal to have for the day
    • New pencil (pencils with designs and mechanical pencils)
    • Write with a pen for the day (student favorite)
    • Chew gum
    • Piece of candy
    • Lunch bunch
    • Treasure Box
Explains how to set up a token economy in an elementary classroom, while spending virtually no money!Explains how to set up a token economy in an elementary classroom, while spending virtually no money!
  • The ONLY things I spend money on are candy and gum! Everything else is just what I already have in the classroom, and are things that I'm willing to manage.

I use a small sheet like the one below for documentation. I use a check mark to show that they paid for Fun Friday, and then jot a quick note about what they purchased. On the back, I write down who has paid for Lunch Bunch, as I only have Lunch Bunch once per month.

The yellow tickets, are what my school uses in common areas, as well as at specials. These have a value of $5 in my classroom, and can be used just like our classroom cash.
Explains how to set up a token economy in an elementary classroom, while spending virtually no money!

Saturday, August 20, 2016

10 Teacher Finds From Walmart

Y'all tonight I went to Walmart for laminating sheets and came away with a cart full....I know you've done the same thing! I thought my room was done, we've finished our second week of school. But I keep finding more things I need!

So as I walked around I kept finding more new things (or things I didn't know they had!) that I had to share you! First of all, I love buying their brand of laminating sheets. They do just as good of job and they are so much cheaper.


I actually came to Walmart for more bath mats. The square mats are excellent for "Read to Self" or "Read to a Partner" time. My students love spreading out on the floor and these are only $5.77. The rubber basket I found was an awesome deal at $5.00.


The next thing I just fell in love with are these flash card rings. They were only $1.24 each, can you imagine the possibilities? Already pre-cut with the ring...just waiting for sight words, vocabulary words, you name it!


I had to get some of these, only $2.88 per package. I am going to put one on each student's desk in hopes we can keep more pencils off the floor!!


Walmart's small whiteboards are only $1.97 each right now. The best thing is, it includes the marker and the magnets. I bought some for my small groups.


I am in love with these cube seats! My colors this year are black, teal and green. So for $16.00, how can you beat it? I really want to add a couple of these to my reading center.


While in the stationary section, I picked up some clip tabs for my planner. I thought the cute flag stickers would be great for students to use during their independent reading, and the hand sticky notes.....I mean they're just cute, right?


Finally, I am in love with these chalkboard easels! I put one at each of my groups. You can read about how I use them here. They are under $6.


I hope you are getting your classroom "just right" and finding some great deals too!


Love our ideas? Follow us on Facebook and Pinterest to stay up to date on all our best classroom tips!

Thursday, August 18, 2016

Class Dojo - Student Stories


Hey there, It's Gary from ScrappyGuy Designs.   My first week with students is in the books for the 2016-2017 year. It was a roller coaster as usual, but we ended in a good place on Friday. One of the reasons for this is that I stuck to my classroom management tool, Class Dojo. There have already been some posts on the Primary Peach about using Class Dojo as positive management. Such as this one from Amy in The Land of 2nd Grade.


The creators of Class Dojo have really been working hard in the past few years to update their site and turn it into a true one stop shop for teachers, students, and parents. They've really listened to feedback and tweaked their site to include so many really useful features.

I love using it because the kids buy into it as soon as they are able to create their own character. They love the creatures and have fun coming up with their own. Also, the message feature is perfect for getting out notes to all the parents. I have it connected to my personal email, which parents can't see, so any replies come directly to my phone. I can choose to handle them immediately,  or wait until school hours. It's definitely made some problems go away for me. The Class Story feature is another favorite as I can upload pictures from the classroom to share with only parents without having to worry about Social Media security.

This year Dojo is including a new feature called Student Story. It works the same as the Class Story, but it is just for each individual student. You can post pictures or share achievements for just that person. I'm already thinking about goal setting for the students so parents can see how they are doing.

What is the best news about this new features is that the STUDENT can now add stories to this area. They can add pictures and other materials directly to their own student story. What a great way to have them submit work in a new and exciting way.

All they have to do is log in to their class dojo, scan the class QR code with a QR reader and it will allow them to post to their own story. They can even do this with their own devices in your classroom or from home.


I just think this is a great way to open up a child's work and breach the gap between home and school. Parents get immediate notice that something new is added to their child's story and they can give feedback on projects. This will open up a line of communication that has never been possible before between Teacher, Parent and Student as everyone can see exactly what is occurring in the classroom.

Give it a try!


http://scrappyguy.blogspot.com/


 If you would like more ideas from The Primary Peach, be sure to follow us on Pinterest, Instagram, and Facebook to catch all the freebies and ideas and more!

Tuesday, August 16, 2016

Using a Boo Boo Basket in the Classroom!

Oh my goodness! If I had a nickel for every bandaid I gave out in my classroom, I just might be a millionaire! My sweet little firsties think that a bandaid will make them feel all better, and maybe even save the world! You've got to love that innocence, right!? However, having to go get a bandaid from the cabinet above my sink multiple times throughout the week got very annoying, so this year I decided to do something to tackle the madness!  Introducing, the Boo Boo Basket!


This little basket has already been a huge help in my classroom! Of course I think it's so important to set up some rules and procedures for using this basket, so it does not get taken advantage of or overused! Now, whenever one of my sweet little firsties tells me that they have a boo boo, I just send them over to the Boo Boo Basket and they take care of themselves!


I also LOVE keeping this bottle of Feel Better Lotion Potion in the Boo Boo Basket for any little boo boo's that don't require a bandaid, or even sometimes my kids are feeling sad and just need to feel better! It's MAGIC!!! Actually, it's just lotion from Bath and Body Works, but don't tell them!


The great thing is, you can keep as little (or as much) in your Boo Boo Basket as you like! Whatever works best for YOUR classroom and YOUR students!


Think you'll want to use the Boo Boo Basket in your classroom, grab these Chalkboard Brights AND printer friendly labels for FREE by clicking here or signing up below!


    No Spam. Just Happy Mail.
    Unsubscribe at anytime!
    Powered By ConvertKit
    Want to save this for later? Make sure to PIN the image below!


     If you would like more ideas from The Primary Peach, be sure to follow us on PinterestInstagram, and Facebook to catch all the freebies and ideas and more!


    Sunday, August 14, 2016

    Bucket Filling Your Way to a Caring Classroom Community

     Hi guys!  It's Ashley from Just Reed Blog! As you know, it's CRUCIAL that we build a caring classroom community from day one.  In fact, this is one of the single most important things we can do!  If students know how to treat one another (and how to treat US!), the entire year will run more smoothly.
    I personally use the Bucket Filling system to create a caring classroom community. 

    I begin by reading this book:
    https://www.amazon.com/How-Full-Your-Bucket-Kids/dp/1595620273/ref=sr_1_2?ie=UTF8&qid=1471132288&sr=8-2&keywords=bucket+filler
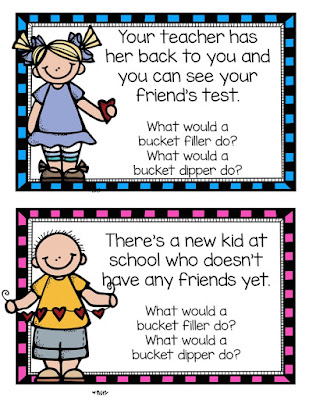
     After reading the book, we discuss what bucket filling really looks like.  What do Bucket Fillers DO?  What do Bucket Fillers SAY?   We sort Bucket Filler and Bucket Dipper behaviors.
    We also practice various scenarios to see what Bucket Fillers and Bucket Dippers do in a variety of situations.  These scenarios REALLY help students to relate to the concept of Bucket Filling and Bucket Filling in a practical way.

      Next, we read this book:
    https://www.amazon.com/Have-Filled-Bucket-Today-Bucketfilling/dp/099609993X/ref=sr_1_1?ie=UTF8&qid=1471132288&sr=8-1&keywords=bucket+filler

    And we create an anchor chart as a group by sorting behaviors into Bucket Fillers and Bucket Dippers.  This chart stays up ALL YEAR long for us to refer to!

    We make fun little buckets out of colorful paper cups.  Fill these with a few warm fuzzy pom poms and  students can take them home as a reminder that we are a classroom of Bucket Fillers!  These are a great conversation starter to share with their parents as well.
    The inspiration for our craft came from this pin:


    I also LOVE this craft from Jammin' in the Jungle Blog:

    And this bulletin board is too cute!

    What a fun Bucket Filler snack to wrap up your Bucket Filling Unit:


    Bucket Filling is a fun, affordable classroom management system that encourages positive behavior and accountability!  Interested in creating a Bucket Filling Classroom?

    Check out BucketFillers101.com (the Official Site!)

    as well as my companion packet here.  All of the anchor chart parts are included in this packet!
    https://www.teacherspayteachers.com/Product/Bucket-Filler-Brigade-Single-Classroom-License-262613

    justreedblog.com

    Thursday, August 11, 2016

    6 Simple Ways to be More Efficient


    1

    Hi Y’all! It’s April from Grade School Giggles. I don’t know about you, but this time of year is always crazy busy for me. So, today I wanted to share 5 ways to be more efficient.


    Maybe it’s just me, but I doubt it. Teachers tend to be overachievers. We tend to think we can do more than we really can.

    If you’re finding yourself short on time, you probably need to limit yourself. You’ve got to prioritize and pour your time into the most important tasks. Work has a way of using up all available time. If you aren’t focused little tasks will pop up and fill in every second of your day.
    Priorities must be prioritized or they are really just stuff you should do. If you’ve narrowed down your priorities it’s easier to say, “I’m already committed” or “I can’t take that on right now.” Say no more so you can say yes to what matters.


    I find that filling in my available times with specific high priority tasks helps make sure things get done. Keeping a running to do list isn’t enough. I need to schedule the tasks to get them done. You can use this free planning sheet to help.
    Build Better Storage (Green, Yellow, Red)
    I’m short and I often find that parts of cabinets, closets, shelves, etc. aren’t easily accessible. Often I need to use all of the storage available, but I definitely don’t want to constantly need to pull over a chair to get things down. So, I try to think of storage like a stoplight.

    Green - Things that I need to access constantly need to be grab and go. These are the things that I want to keep out all of the time. This stuff goes in baskets, boxes, or on open shelving.

    Yellow- I use it sometimes, but not as often. I can take it out to use and put it up when I’m done. This stuff stays accessible, but not necessarily out in the open. Put this stuff in drawers or cabinets.

    Red – I’m not ready to let go of this stuff. Maybe I need to hang on to it to cover my behind (think old paperwork) or maybe it’s specific to unit or season. This stuff gets stored out of the way. It might go in storage in the workroom, be boxed up on top of cabinets, or go in the back of a closet. It will come out when it’s needed.
    Systemize Your Paperwork (link to blog post)
    First of all, pick one a spot for all of the paperwork. If you don’t have a specific spot it will end up as a huge pile taking over your desk. Yuck!

    Create a way to sort it. Personally, I used a scrapbook paper tower for sorting my paperwork. Label your categories.

    Next, develop a management system. Plan when you will check your mail and when you will deal with paperwork. You can read more about what worked for me here.

    You’ll also want to have a routine for papers going to parents and coming in with students. Some schools use the weekly folder, which is great for things like returning work and sending, PTA notes, and newsletters. But, you still need to have something that’s checked EVERY – SINGLE- DAY.
    This is a biggie! Whenever possible do things once and only once. Here are few
     of my favorite ways to do things only once.
    ·      Laminate blank nameplates, tags, and charts at the beginning of the year. You can write new student names right on top of the laminating when a new student arrives.
    ·      Use student numbers. Label cubbies, mailboxes, supply boxes, etc. with numbers rather than names. Not only is it less to write, but you can use them again year after year without relabeling them.
    ·      Laminate sticker charts and use a wet erase marker to initial them.
    ·      Create anchor charts, laminate them, and add the information or interactive parts with sticky notes or hook and loop tape so that the charts can be reused.
    ·      Use a solid colored fabric for the background of your bulletin board. It lasts for years!
    Develop Student Independence (link to visual schedule)
    There are some things you need to do for your students because you’re the adult, but there are a lot of ways that you can increase their independence. The more independent your students are, the more you are freed up to support them where they really need it.


    Developing and teaching consistent routines and procedures goes a long way, but I also like to use a visual schedule. It lets them know what’s coming and helps reduce questions like, “When’s lunch?”

    Teaching is a job that never ends. If you’ve got help, use it! Parent volunteers are huge time savers. Let them help with things like running copies, stuffing weekly folders (add any confidential papers later yourself), laminating, and cutting out lamination.
    For repetitive tasks like running copies you can simplify things by writing out instructions once. Copy notes make it super easy. You can read more about how to use them and get a free copy here.

    Hopefully you’ve gotten some ideas for being more efficient. If you have any tips of your own leave a comment and share them with us.